Jupiter Terminal: Easiest way to add Jupiter to your DApp

Jupiter Terminal is an open-sourced, lite version of Jupiter that provides end-to-end swap flow by linking it in your HTML with just a few lines of code.
Mode is Deprecated in v1. Use formProps instead.
Core Features
- main-v1.js bundle ~70Kb gzipped
- app bundle (~900Kb) is loaded on-demand when init() is called.
- alternatively, preload the app bundle with data-preload attributes.
- Several major built-in wallets, or passthrough wallets from your dApp.
- Auto wallet detection for Versioned Tx.
- Flexbile display modes, Modal, Integrated, or Widget.
- Flexible form customization, e.g. Full swap experience, Payment flow.
- Support ExactIn, and ExactOut swap modes.
- Flexible layout, and customizable stylings.
- Fees support.
Getting Started
Integrating Jupiter Terminal
In your document, link, and embed main-v1.js.
<script src="https://terminal.jup.ag/main-v1.js" />
Preloading Terminal
Assign the attribute data-preload to the script tag, the full application will be preloaded on your browser's (document.readyState === "complete") event.
<script src="https://terminal.jup.ag/main-v1.js" data-preload />
Then,
// It is recommended that you use your own RPC endpoint.
// This RPC endpoint is only for demonstration purposes so that this example will run.
const SOLANA_RPC_ENDPOINT = "https://neat-hidden-sanctuary.solana-mainnet.discover.quiknode.pro/2af5315d336f9ae920028bbb90a73b724dc1bbed/"
window.Jupiter.init({ endpoint: 'https://api.mainnet-beta.solana.com' });
Always make sure that you are using your own RPC endpoint. The SOLANA_RPC_ENDPOINT above example may not work anymore.
Built-in wallets, or passthrough wallets from your dApp
Mode 1: Wallet passthrough
If your user has connected their wallet via your dApp, you may pass through the wallet instance via the init({ passThroughWallet: wallet }).
const App = () => {
  const { wallet } = useWallet();

  const initJupiter = () => {
    if (wallet) {
      window.Jupiter.init({
        endpoint,
        passThroughWallet: wallet,
      });
    }
  };
};
Mode 2: Built-in wallet
If your user is not connected, Jupiter Terminal has several built-in wallets that users can connect to and perform swaps directly.
Jupiter Terminal Multi-mode
There are currently 3 modes to integrate Jupiter Terminal into your dApp.
Modal: By default, Jupiter renders as a modal and takes up the whole screen.Integrated: Renders Jupiter Terminal as a part of your dApp.Widget: renders Jupiter Terminal as a widget that can be placed in different positions.
- Modal Mode
- Integrated Mode
- Widget Mode
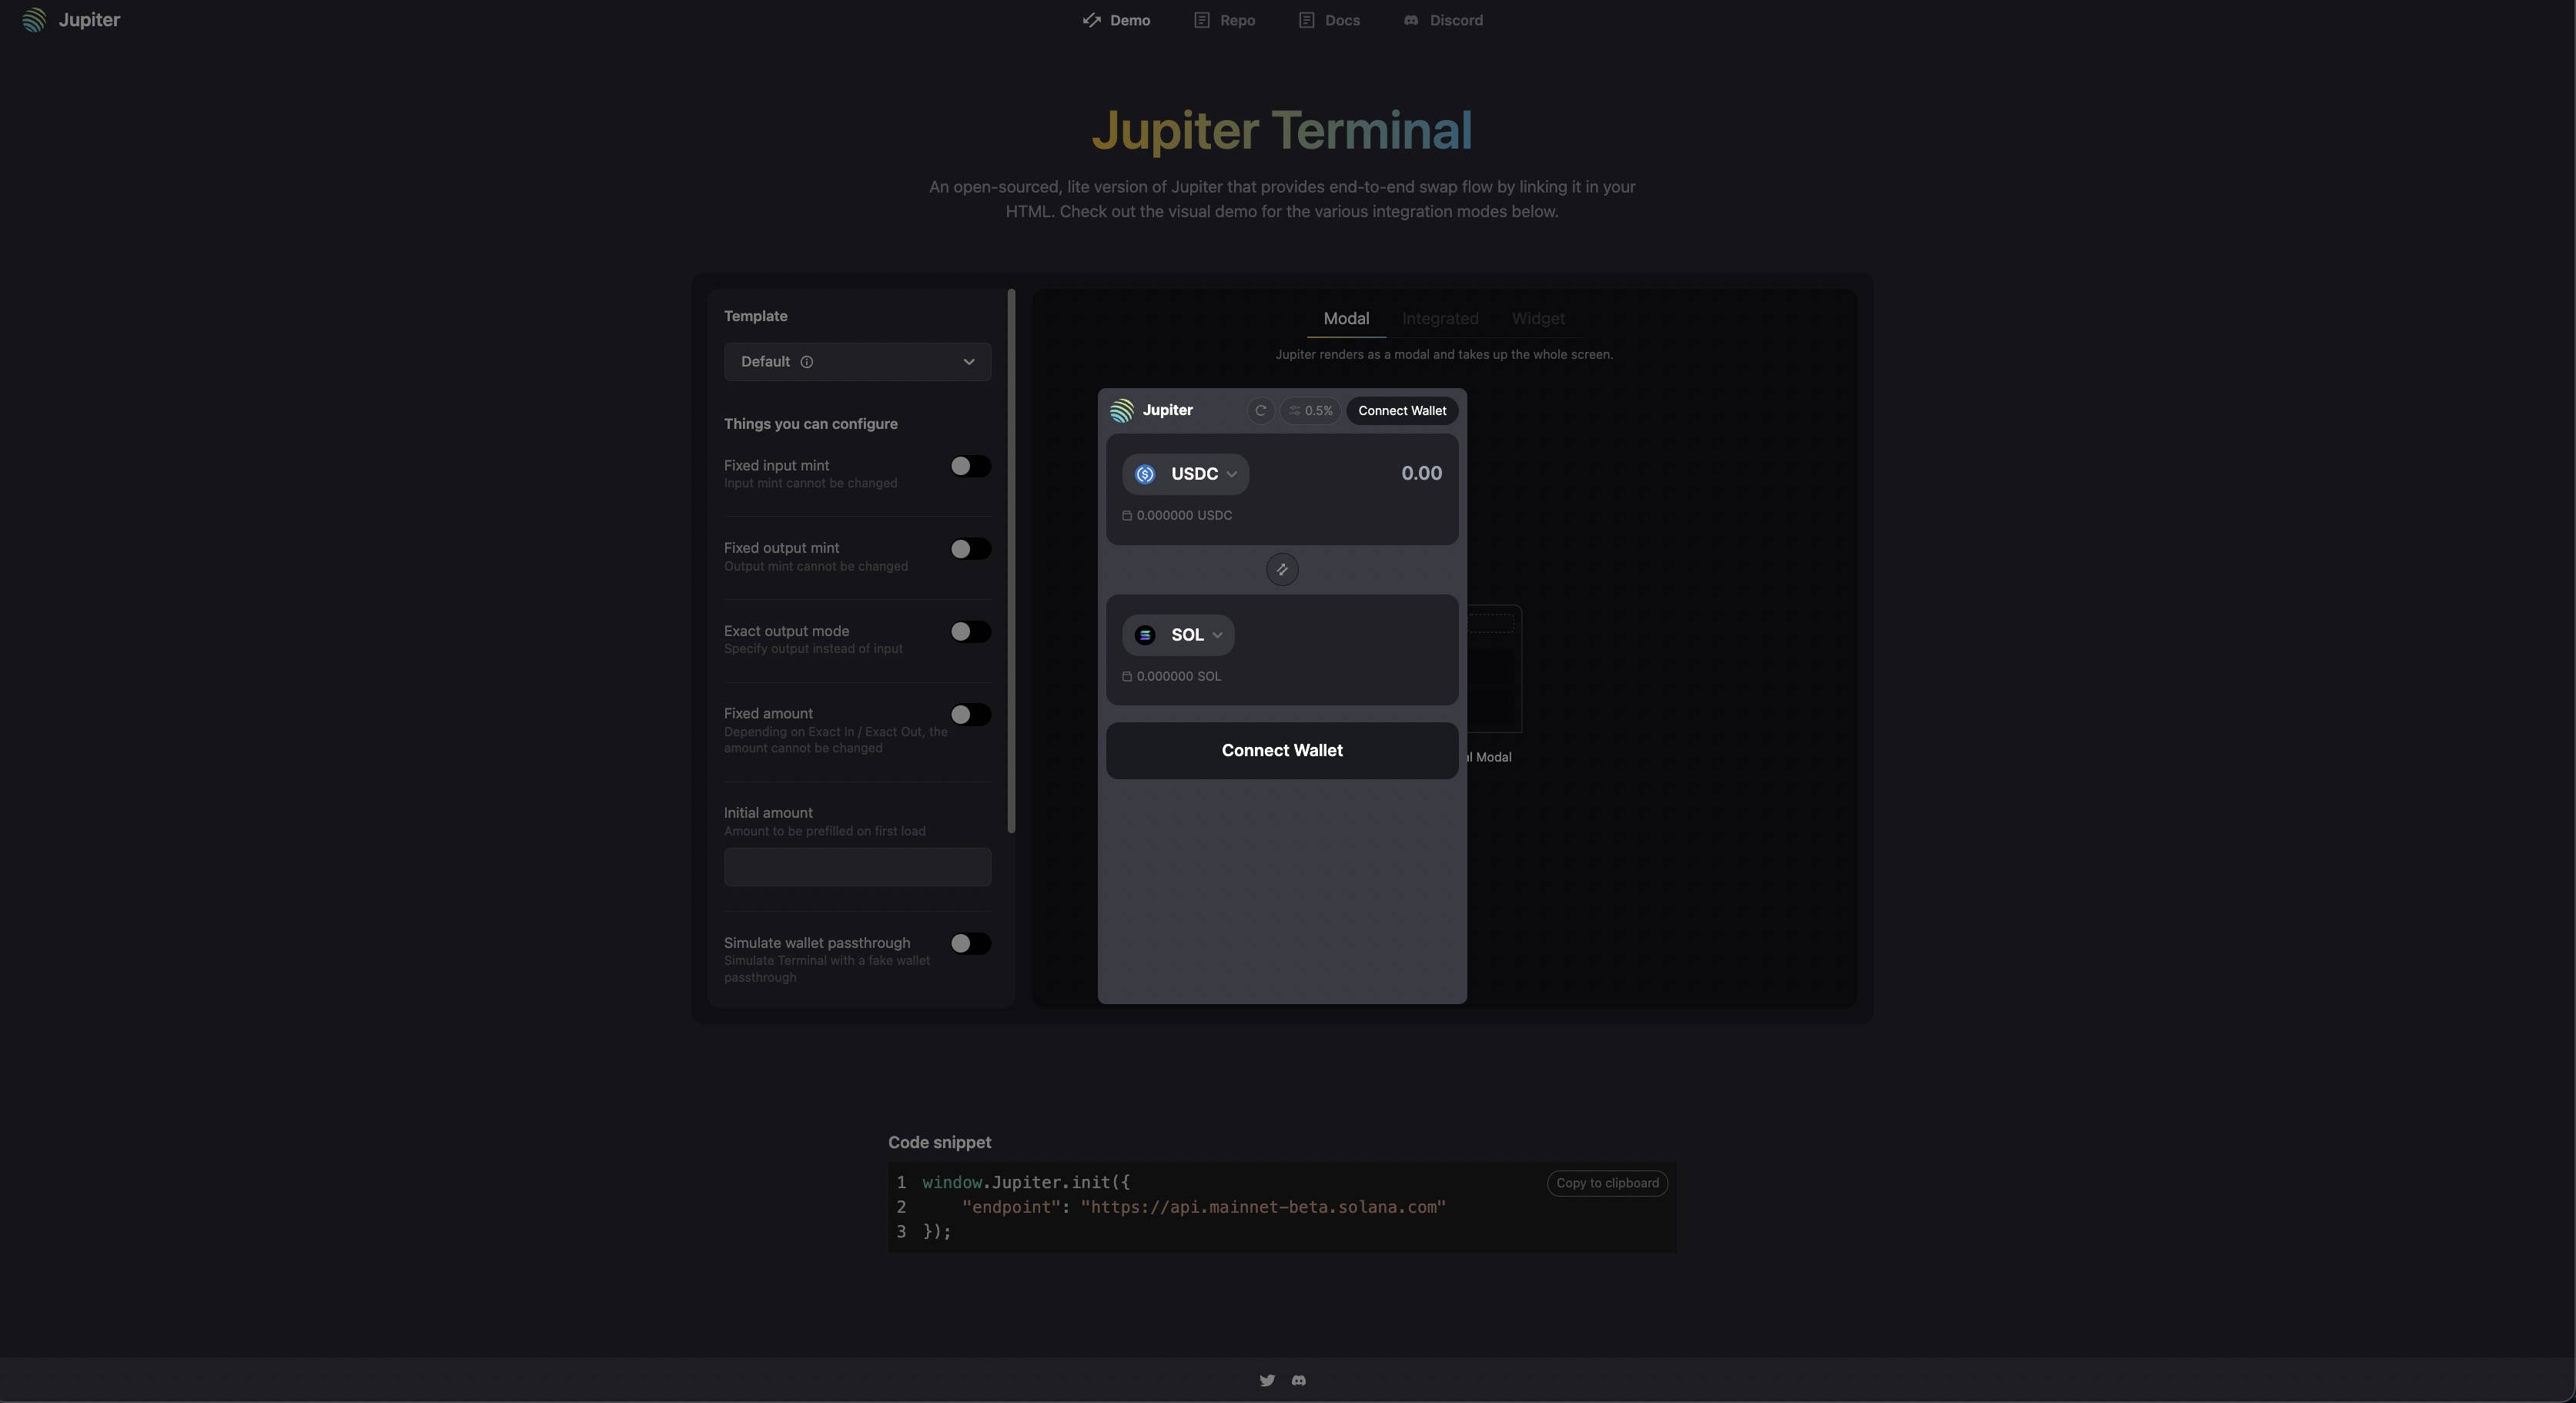
Jupiter Terminal: Modal Mode
By default, Jupiter renders as a modal and takes up the whole screen.
window.Jupiter.init({ displayMode: 'modal' });
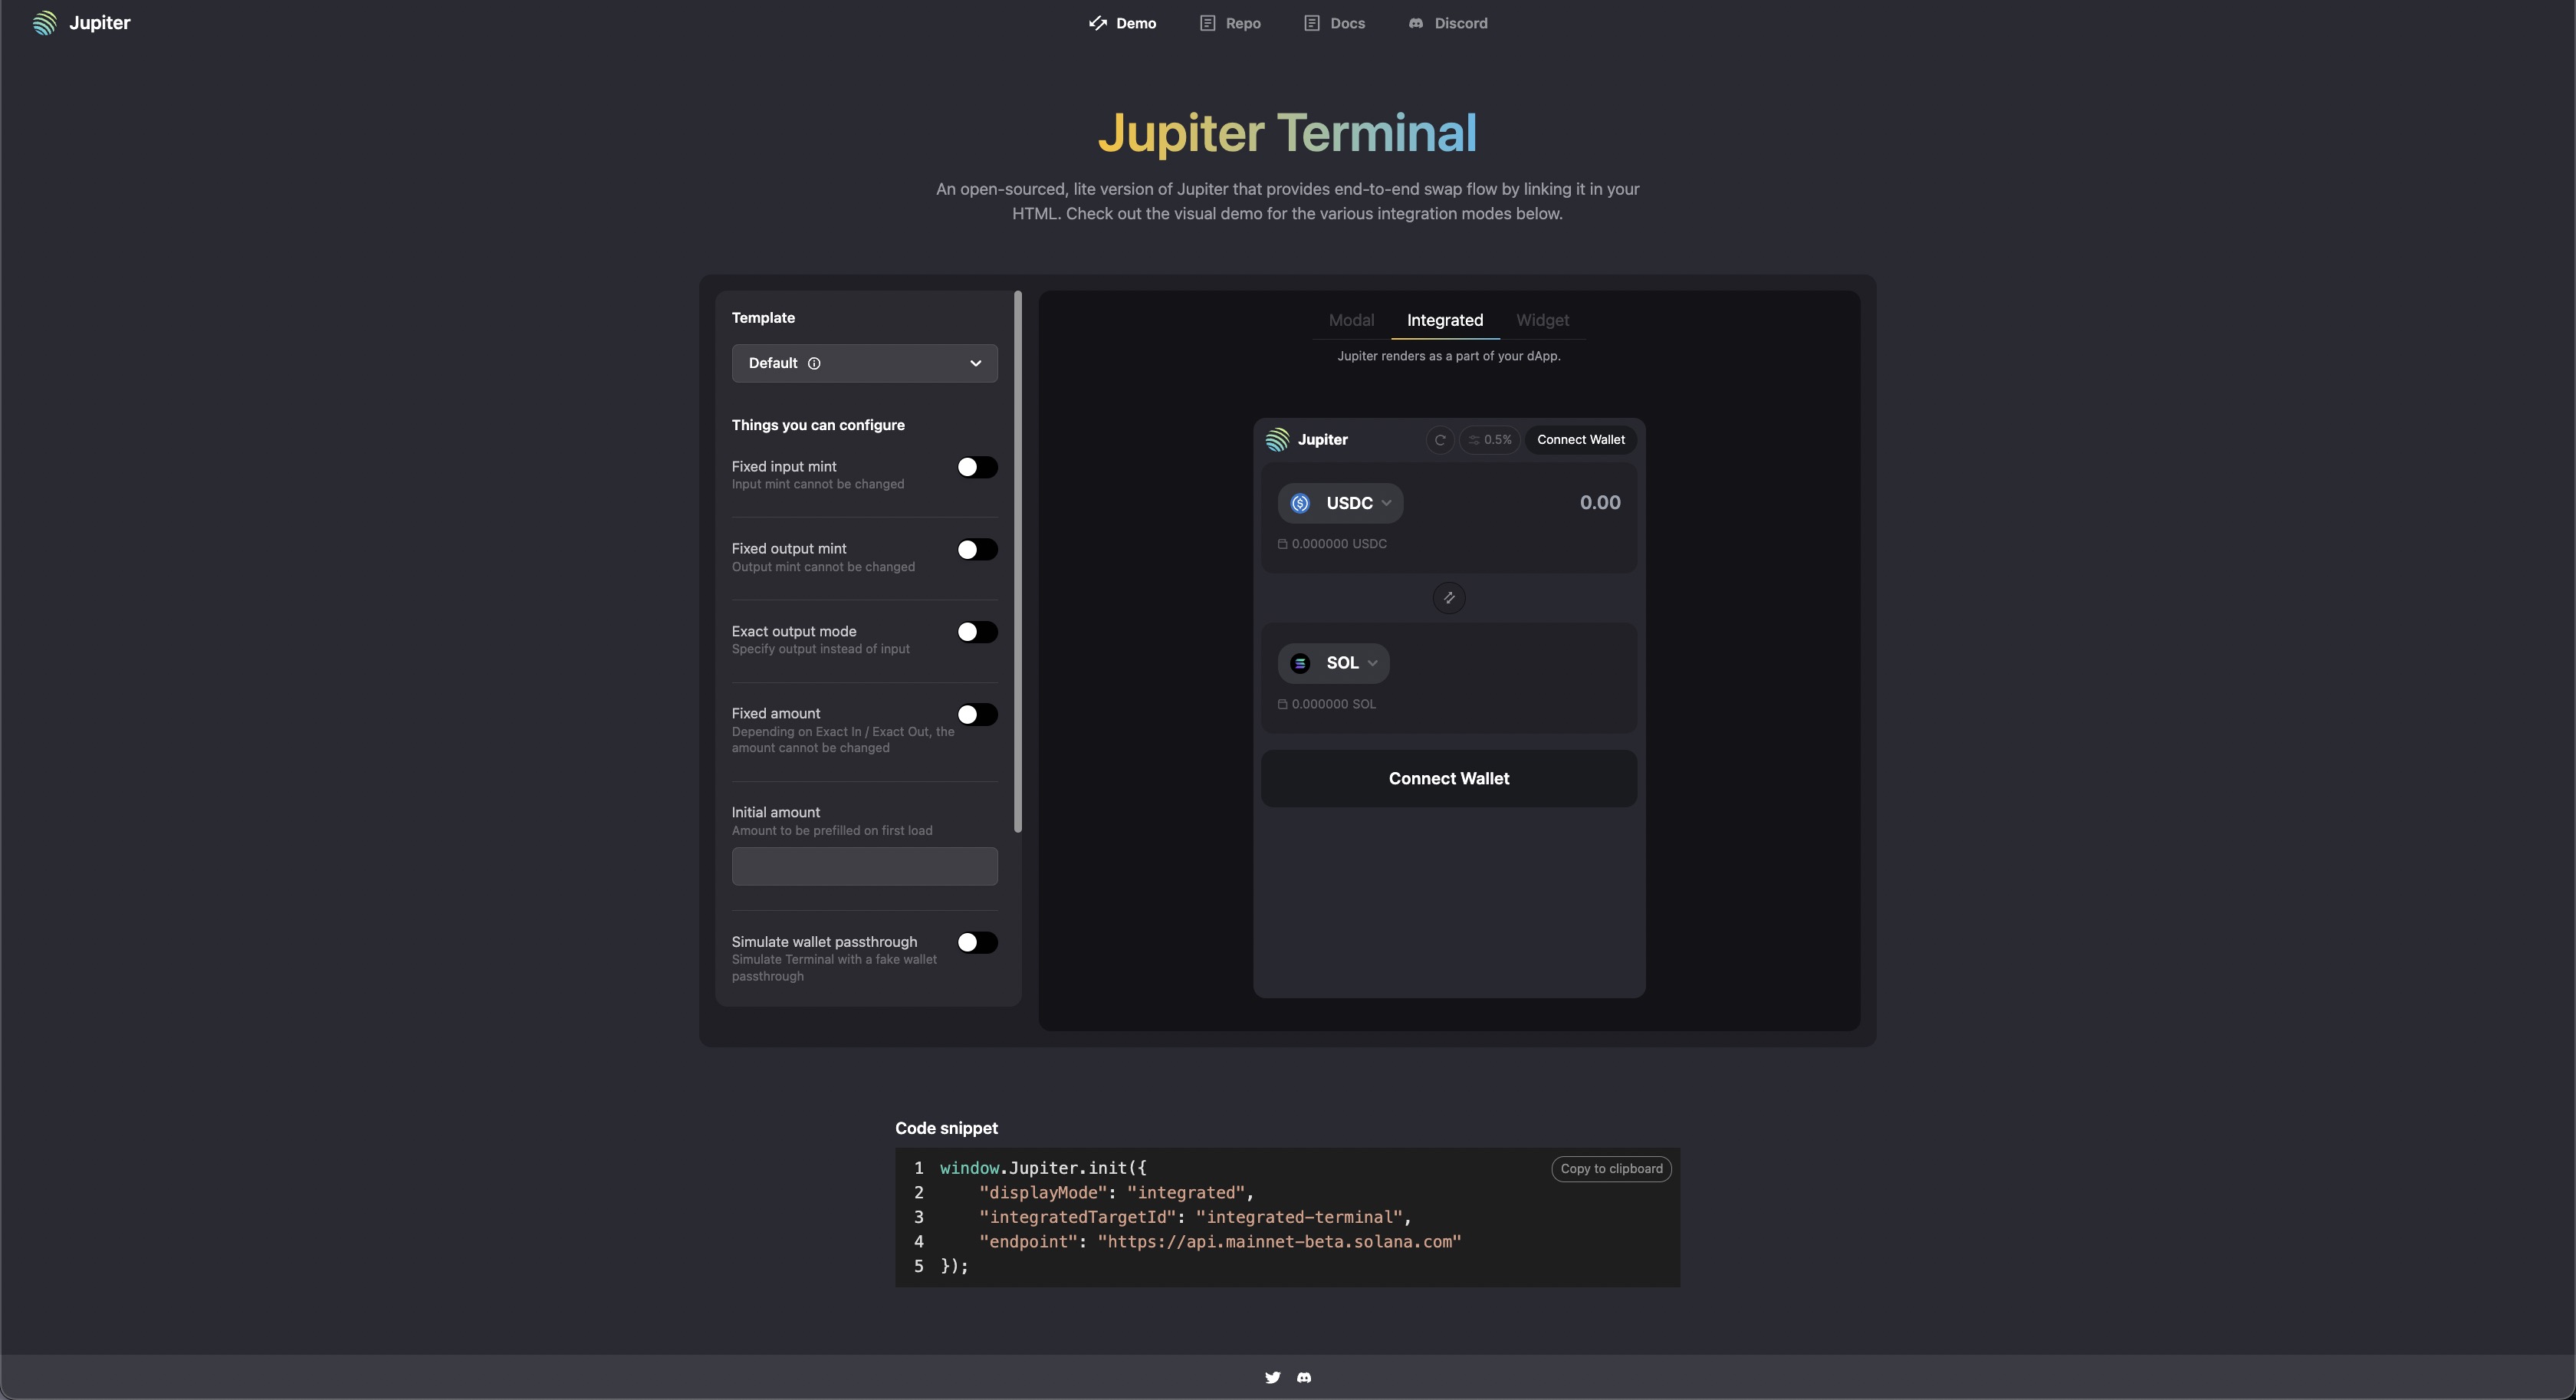
Jupiter Terminal: Integrated Mode
Integrated Mode renders Jupiter Terminal as a part of your dApp.
window.Jupiter.init({ displayMode: 'integrated' });
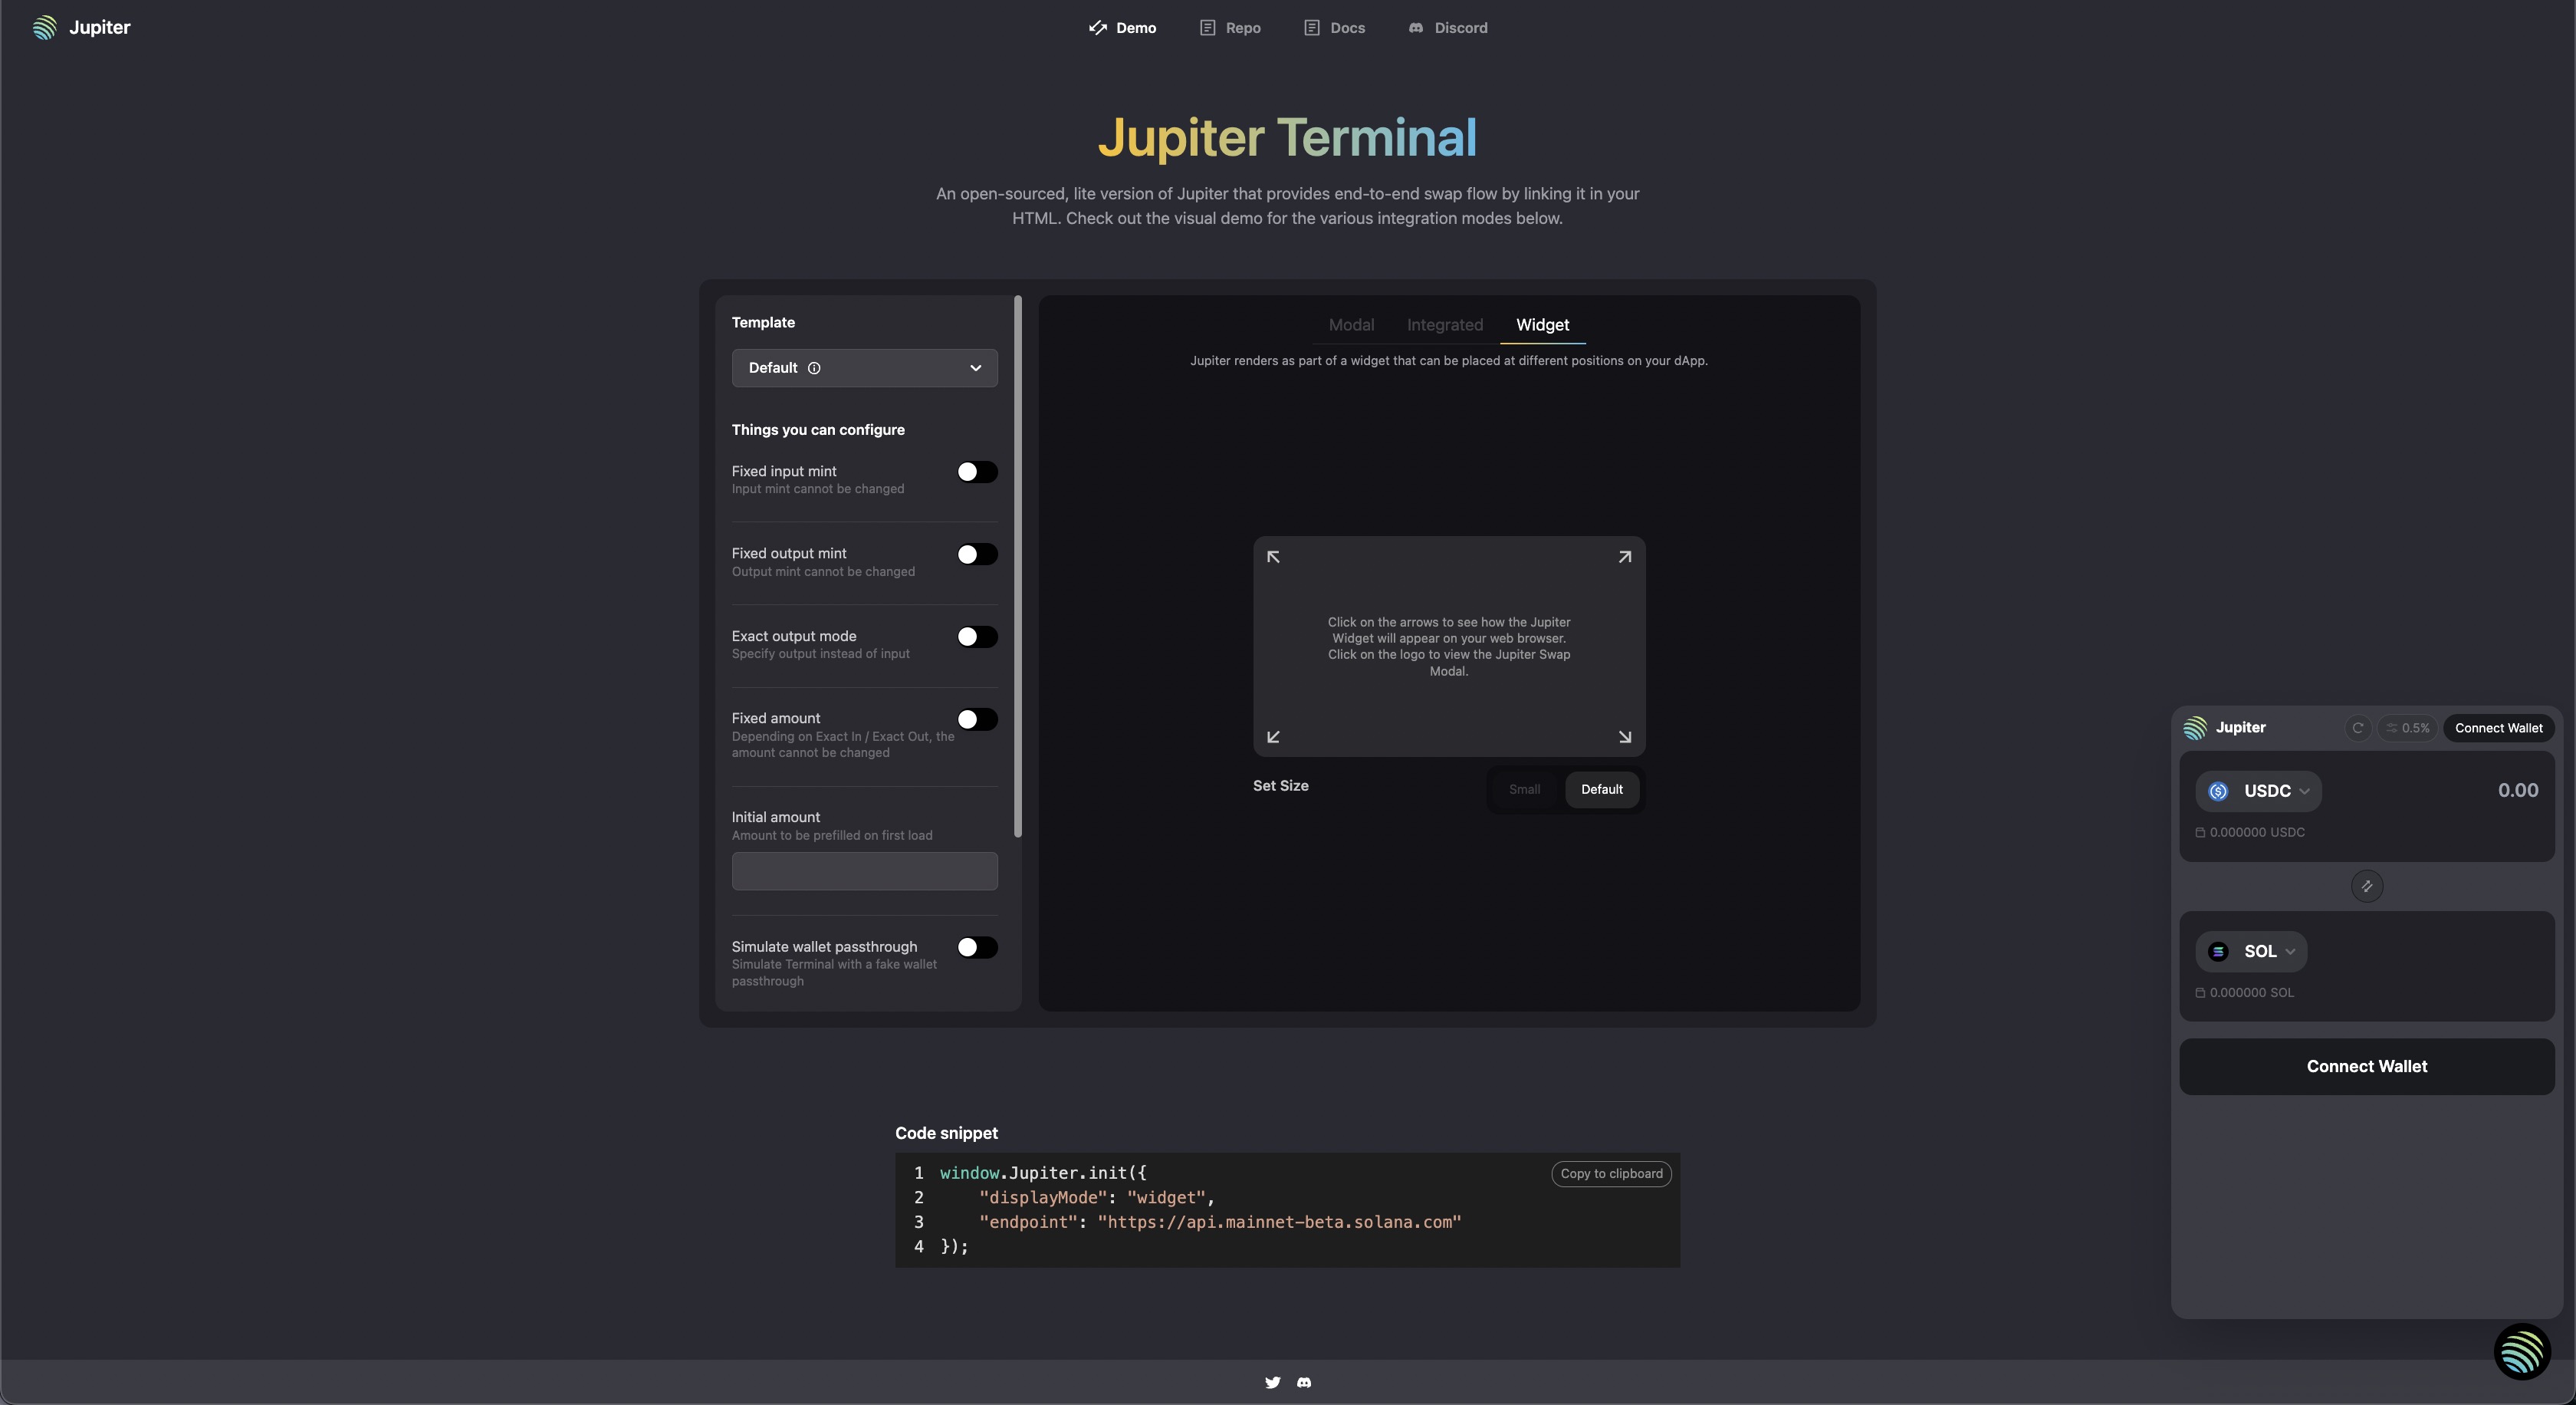
Jupiter Terminal: Widget Mode
Widget mode renders Jupiter Terminal as a widget that can be placed in different positions.
window.Jupiter.init({
  displayMode: 'widget',
  widgetStyle: {
    position: 'bottom-right', // 'bottom-left', 'top-left', 'top-right'
    size: 'default', // 'sm'
    },
});
formProps (Available on v1)
Configure Jupiter Terminal's behavior and allowed actions for your user
- swapMode?: SwapMode.ExactIn | SwapMode.ExactOut
- Default to ExactIn, where users input the number of tokens they want to swap.
- On ExactOut, users input the desired amount of tokens they want to receive.
- initialAmount?: string
- The initial amount
- fixedAmount?: boolean
- The initial amount is fixed, the user cannot change the amount.
- Depending on swapMode, fixedAmount will be applied to the input or output amount.
- initialInputMint?: string
- The default input mint
- can be used with fixedInputMint
- fixedInputMint?: boolean
- must be used with initialInputMint
- user cannot change the input mint
- initialOutputMint?: string
- The default output mint
- can be used with fixedOutputMint
- fixedOutputMint?: boolean
- must be used with initialInputMint
- user cannot change the input mint
Mode (Dececated in v1)
Integrators on mode props need to migrate to formProps, which offers more flexibility in customizing interactions, and more capabilities.
Example of how to migrate from mode to formProps:
default: Default mode, the user can swap between any token pair. No action is required.outputOnly: Output only mode, user can only swap to destination pair.
// Can be mapped to:
window.Jupiter.init({
  endpoint: 'https://api.mainnet-beta.solana.com',
  formProps: {
    fixedInputMint: undefined,
    swapModeExactOut: undefined,
    fixedAmount: undefined,
    initialOutputMint: 'So11111111111111111111111111111111111111112',
    fixedOutputMint: true,
  },
});
Resuming / Closing activity
- Every time
init()is called, it will create a new activity. - If you want to resume the previous activity, you can use
resume(). close()function only hides the widget.
if (window.Jupiter._instance) {
  window.Jupiter.resume();
}

window.Jupiter.close();
Fees support
Similar to Jupiter, Jupiter Terminal support fees for integrators.
There are no protocol fees on Jupiter, but integrators can introduce a platform fee on swaps. The platform fee is provided in basis points, e.g. 20 bps for 0.2% of the token output.
Refer to Adding your own fees docs for more details.
Note: You will need to create the Token fee accounts to collect the platform fee.
import { getPlatformFeeAccounts } from '@jup-ag/react-hook';

// Jupiter Core provides a helper function that returns all your feeAccounts
const platformFeeAndAccounts = {
  feeBps: 50,
  feeAccounts: await getPlatformFeeAccounts(
    connection,
    new PublicKey('BUX7s2ef2htTGb2KKoPHWkmzxPj4nTWMWRgs5CSbQxf9') // The platform fee account owner
  ) // map of mint to token account pubkey
}

window.Jupiter.init({
  // ...
  platformFeeAndAccounts,
});
onSuccess / onSwapError callback
onSuccess() reference can be provided and will be called when the swap is successful.
While onSwapError() will be called when an error has occurred.
window.Jupiter.init({
  onSuccess: ({ txid }) => {
    console.log('onSuccess', txid);
  }
  onSwapError: ({ error }) => {
    console.log('onSwapError', error);
  },
});
Customizing styles: CSSProperties
Any CSS-in-JS can be injected into the outer-most container via containerStyles API.
Examples:
- Custom zIndex
window.Jupiter.init({
  // ...
  containerStyles: { zIndex: 100 },
});
- Custom height
window.Jupiter.init({
  // ...
  containerStyles: { maxHeight: '90vh', },
});
Customising className: Tailwind className
Tailwind classes can be injected into the outer-most container via containerClassName API.
Example:
- Custom breakpoints
window.Jupiter.init({
  // ...
  containerClassName: 'max-h-[90vh] lg:max-h-[600px]'
});